 Get Started midas Civil
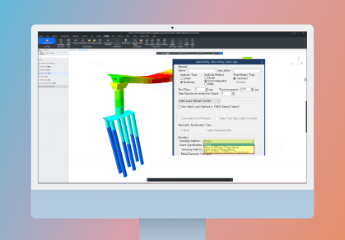
 Featured blog of this week

1. MIDAS OpenAPI
I would like to introduce the basic and advanced information about MIDAS API. I was surprised that many users wanted to use MIDAS API and asked when we could start to use it. Users have contacted us worldwide regardless of specific regions, company size, and areas.
First, I want to introduce MIDAS API and suggest how MIDAS API can be utilized and customized to your workflow. MIDAS has a plan to provide user-friendly support functions for API starters.
Introduction to MIDAS OpenAPI

These days, the boundaries of professional fields are collapsing. Even in the CIVIL and architectural areas, where people commonly consider conservative fields, engineers are familiar with the term "Automation work process." Some companies or engineers try to build automation systems in their work environment. For that, APIs are playing a crucial role in integrating CAE engineering software and tools. The APIs will help seamless communication between different software, allowing engineers to enhance their workflow, automate tasks, and improve efficiency in structural analysis, design, and other processes.
How does MIDAS OpenAPI work?
MIDAS finally opens APIs to increase connectivity within MIDAS family products, cooperate with other software, and integrate overall CAE project data. MIDAS chose a Web-based REST API and WebSocket API within many API operating methods.
What is REST API? REST API requests and receives the data between the client and the data server. The "REST" stands for Representational State Transfer and has the data format rules and requests using HTTP Methods, such as GET, PUT, DELETE, etc. The client and Server transfer the specific data using Endpoint. It is similar to the web browser URL. The REST API is usually used in the SNS, cloud service, or mobile applications, which only request an upload or download once.
Then, what is WebSocket API? Based on JSON data, WebSocket API provides bidirectional communication between the client app and the Server. The WebSocket API is usually used for live chat, stock applications, and online games, which need to keep the connection to get and send information in real time. Do you still need clarification? You don't have to understand software development fields. I will give you clarity from now on.

MIDAS API connection methods
While MIDAS' local product (Client) connects with APISever, the client can request the connection or send the data to the product through APIServer. The request and response don't need connection continuity. MIDAS chose the REST API method between the client and APIServer to use the API server efficiently. Then, how can APIServer find your local PC? When operating MIDAS API, you can find the "MAPI-Key" in the product. The Server can find you through the key number, and the "MAPI-Key" is an authentication system that can protect users from security issues.
The basic structure of MIDAS API
Let's figure out how MIDAS API transfers data. All of MIDAS' family products use the JSON format for transferring modeling(pre-process) and analysis results data(post-process). The JSON* stands for "JavaScript Object Notation, " Its name is used only for JavaScript; however, any web-compatible language, such as Python, VBA, etc., can be used.
💡 JSON* structure is { key: value}. JSON is a human-readable data format.
MIDAS CIVIL API structure is similar to the *.mct. If the user has experience using the *.mct format, it will be easy to use CIVIL API.
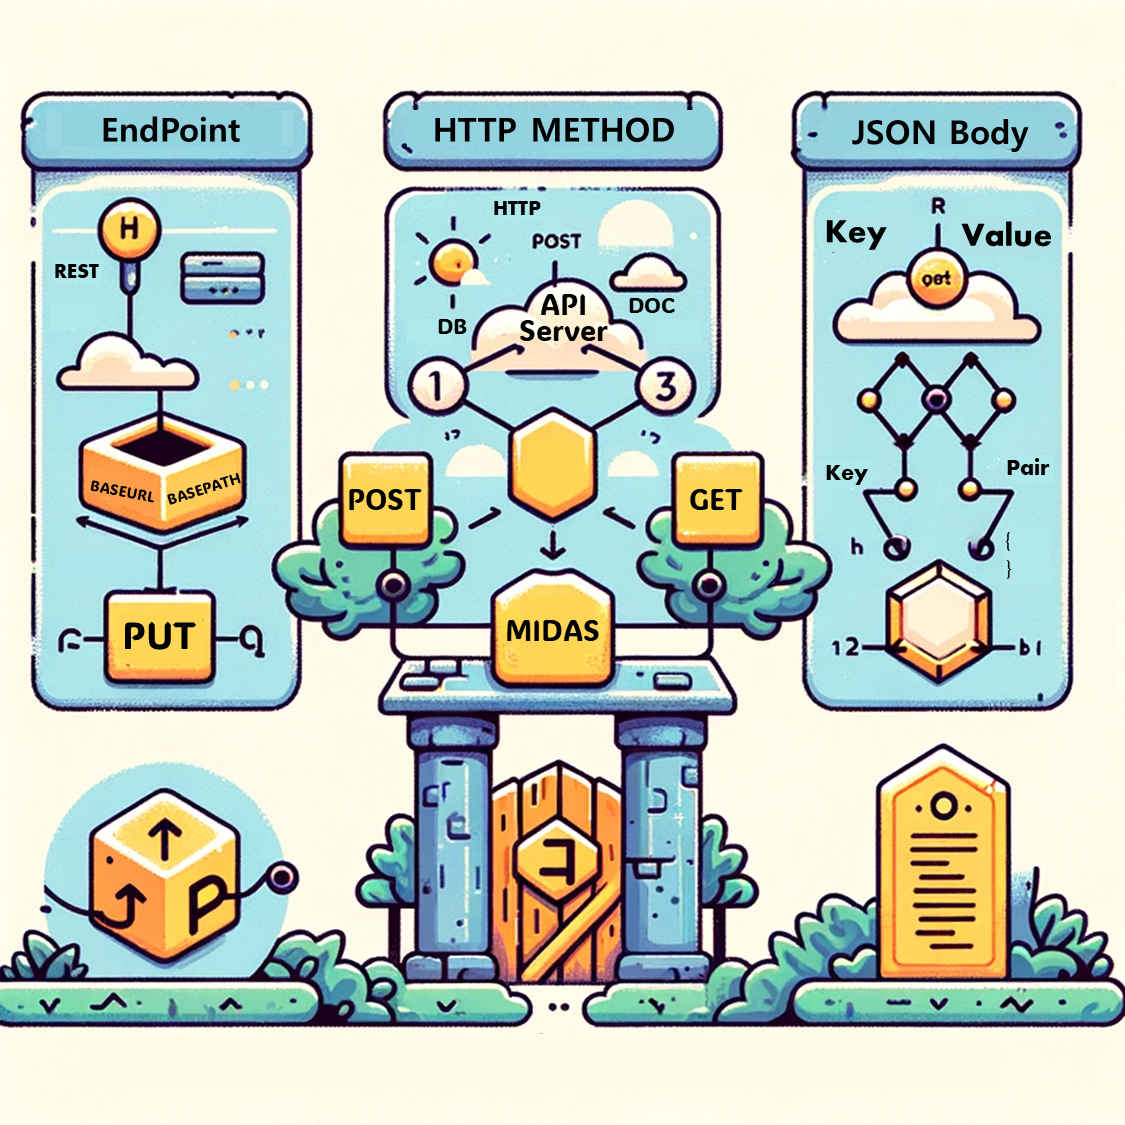
Three essential components to use REST API
To start to use REST API, the user needs to know three essential things:
1. HTTP Method: Decide how to interact with the data. The Method acts as CRUD operations. The MIDAS API uses four methods, and here are the details.
a. POST (Create): Create new data on the software (e.g., create a new node, element, material, etc.)
b. GET (Read): Read the data from the software (e.g., Get created node coordinates)
c. PUT (Update): Update specific or all data (e.g., change no. 3~ 10 nodes coordinates, or change the materials)
d. DELETE (Delete): Delete specific or all data (e.g., remove no. 101~130 elements or all elements)
2. EndPoint: EndPoint indicates and drives specific data for access. Each database has an access address, like a command. EndPoint consisted of Base URL and Base Path. The Base URL is the API Server URL, and the Base Path indicates specific commands such as access to the database and getting into the node information. Every data resource has its access path, so the user must know it for data control.
3. JSON Body: As I mentioned before, MIDAS products and clients communicate using JSON format. Specifically, POST and PUT methods are needed in the JSON body to create or update data among the HTTP Methods.
For more information, please visit the MIDAS API Manual website here: MIDAS API workspace - MIDAS-Support
2. Introduction to MIDAS Plug-in
I briefly introduced the MIDAS API, and you might be hesitant to start the API because of strange terms and concepts; however, MIDAS also implemented ready-to-use API applications called MIDAS Plug-in and Excel Connector. CIVIL NX users can use the MIDAS API even if they don't know the API and computer language.
What is MIDAS Plug-in?
Most CIVIL users repeatedly used CAD and Excel for calculations during the CIVIL modeling. The Plug-ins will reduce repeating calculations and data transfer work processes. MIDAS API is a web-based API, so it has a lot of expandable possibilities. For the most, JSON(data format) can be used with web-compatible languages, and Python has a lot of mathematical functions that can be integrated with MIDAS API for several calculations, such as geometric things. In short, combined MIDAS APIs and mathematical functions become powerful API functions called MIDAS Plug-ins.
Here’s the most basic example: when users want to create 20 nodes using create node API, they can choose a convenient way to do it themselves. a) Input every coordinate by hardcoding or b) Use the Python for loop structure as below. Most engineers have used the for loop function when using VBA or MATLAB during their college structural courses.
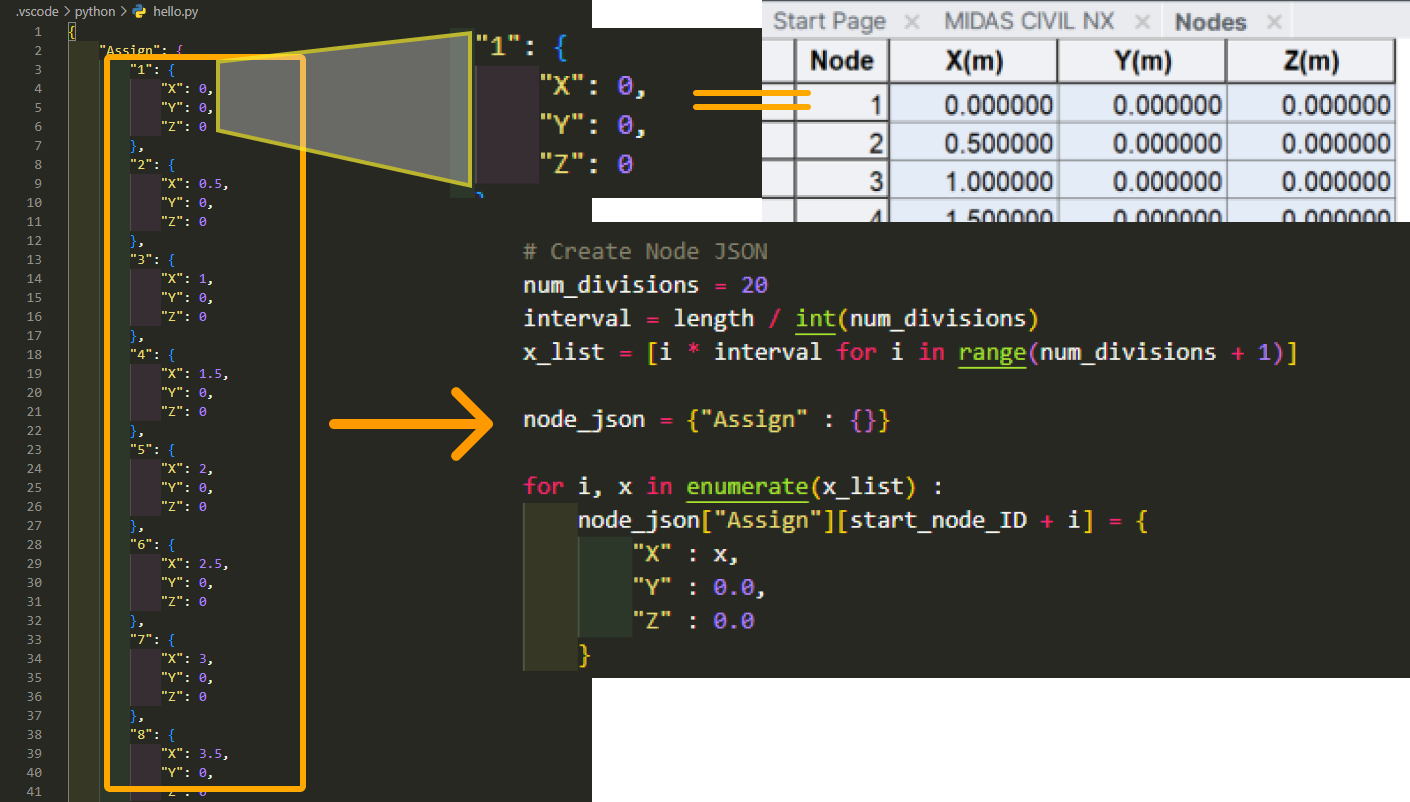
JSON and Python examples of creating nodes
How’s it? Let’s look into more details.
The Benefits of MIDAS Plug-in
Our primary goal in developing Plug-ins is to offer user convenience. MIDAS recognizes that only some users are familiar with API concepts or have a background in computer languages. That's why we've designed our Plug-ins to provide a barrier-free API experience. For those with coding experience, we also offer an advanced environment for user-driven development. In our initial rollout of MIDAS Plug-ins, we launched 12 user-inspired Plug-ins. I'll go ahead and outline their three main benefits in the following discussion.
- Creating and editing models faster than ever
Streamline your modeling process like never before with the 'Create Alignment' Plug-in. Remember the cumbersome steps involved in starting a curved alignment bridge project? Traditionally, you had to divide spans, set bearing, and node locations using CAD and export this as a DXF file to CIVIL for modeling. Changes in alignment meant repeating the entire process, often feeling tedious and time-consuming. Now, with our Plug-in, these steps are significantly simplified. If you have the alignment's length, radius, and division details, you can create and edit the alignment in under 3 seconds. This is just one example of how MIDAS Plug-ins enhance your control over geometry aspects, making the entire process more efficient and powerful.
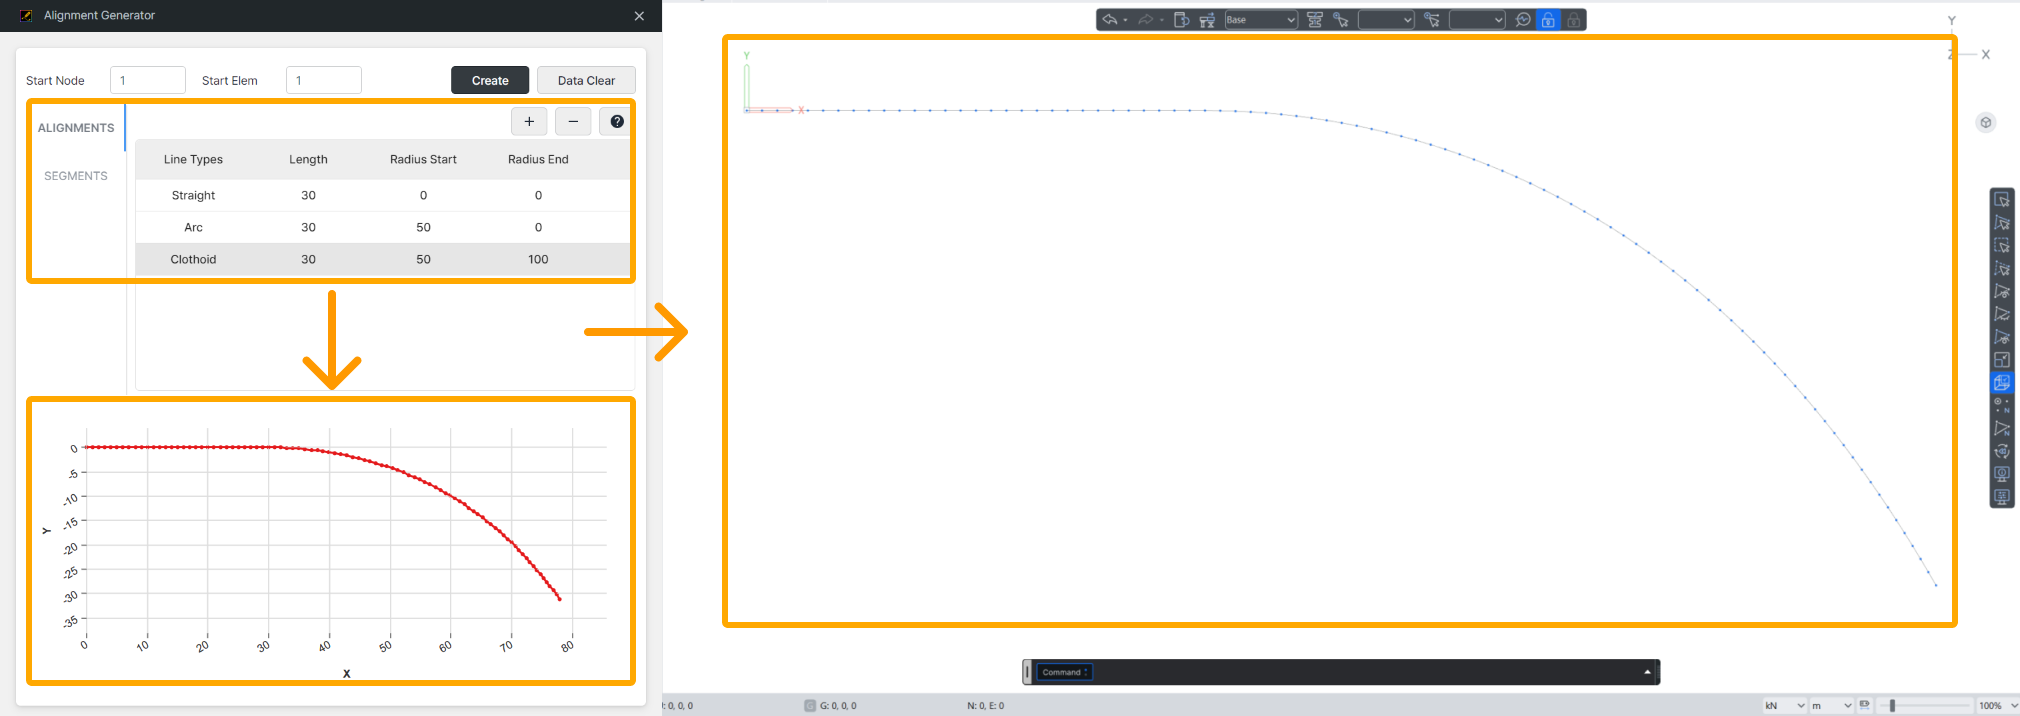
Alignment Create Plug-in; input, preview, create nodes and elements
- Real-time updating
I'd like you to discover the speed and convenience of our web-based Plug-in environment, where updates to CIVIL NX occur instantaneously. No more waiting for product releases; a quick refresh brings the latest Plug-ins to your fingertips. This revolutionary approach enables you to develop and integrate Plug-ins for new standards independently. You can create your Plug-in, upload it to the Marketplace, and blend it into your workflow. Our Design Response Spectrum generator Plug-in, crafted for New Zealand's new seismic load standard, is a prime example. It exemplifies our commitment to innovation, allowing users to adopt new standards in their designs even before they are formally integrated into our products.
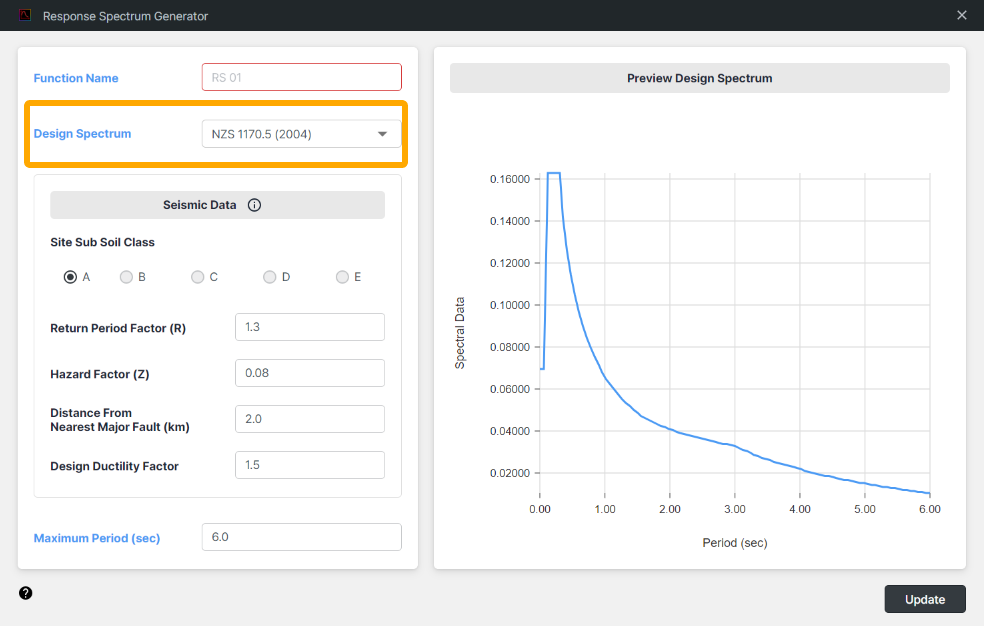
Response Spectrum Plug-in for New Standard Code
- Customize your workflow
What do people usually think when they want to use APIs? They might want to minimize repetitive tasks or optimize their models automatically through iterations. Essentially, people are seeking workflow automation. This is where Plug-ins come into play, allowing you to tailor your workflow to your needs. While customizing workflows with Plug-ins might initially sound ambiguous, it’s relatively straightforward. Plug-ins are potent tools that bridge the gap between your unique requirements and the software's capabilities. They enable you to automate processes, streamline tasks, and incorporate new functionalities that the base software might not initially support.
For instance, the Alignment Creator Plug-in streamlines your project initiation by automatically generating nodes, elements, and node-local axes. The Concrete Material Set Plug-in simplifies creating material sets with time-dependent properties. Additionally, MIDAS Plug-ins facilitate the creation of structural components like piers, pier caps, piles, and pile caps. These tools not only enhance modeling capabilities but also handle complex data tasks with ease. Tasks such as calculating gradient temperature residual stresses or converting tendon coordinates from relative to absolute are effortlessly managed by the Plug-in, significantly reducing laborious work processes.
Used Plug-ins for PSC beam bridge modeling
In conclusion, using Plug-ins for workflow in CIVIL NX is more than just a convenience; it's a transformative tool that adapts to the evolving needs of engineers and designers. By embracing this technology, users can improve their efficiency and productivity and contribute to a dynamic, collaborative community of professionals.
Let’s start with MIDAS Plug-ins
Here’s the MIDAS CIVIL NX Plug-in access method and Plug-in window explanations.

The user can find a new Plug-in menu in the API tab from the MIDAS CIVIL NX. When you open this menu, a new window pops up.
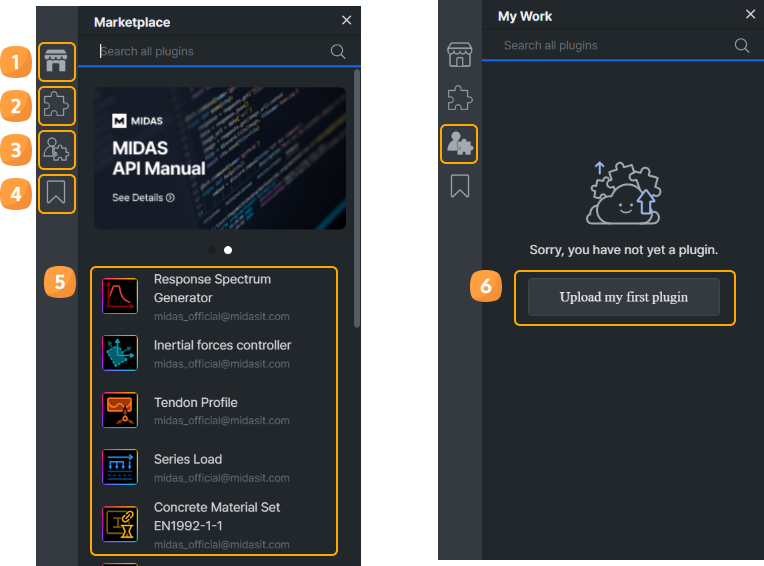
Marketplace(Plug-in) components
1. Market Place: Plug-ins provided by MIDAS
2. Saved Plug-ins: Installed Plug-ins from Market Place
3. My work: Upload user-developed Plug-in
4. Bookmark: User-customized favorite folder. Users also can create their Plug-ins and register on the market.
5. Available contents: Directly shows available Plug-in contents
6. From now on, MIDAS will enhance this user experience by introducing a system for users to upload their Plug-ins and share them on the Marketplace. This feature accommodates different work processes across various countries, allowing users or companies to share their Plug-ins internally or publicly.
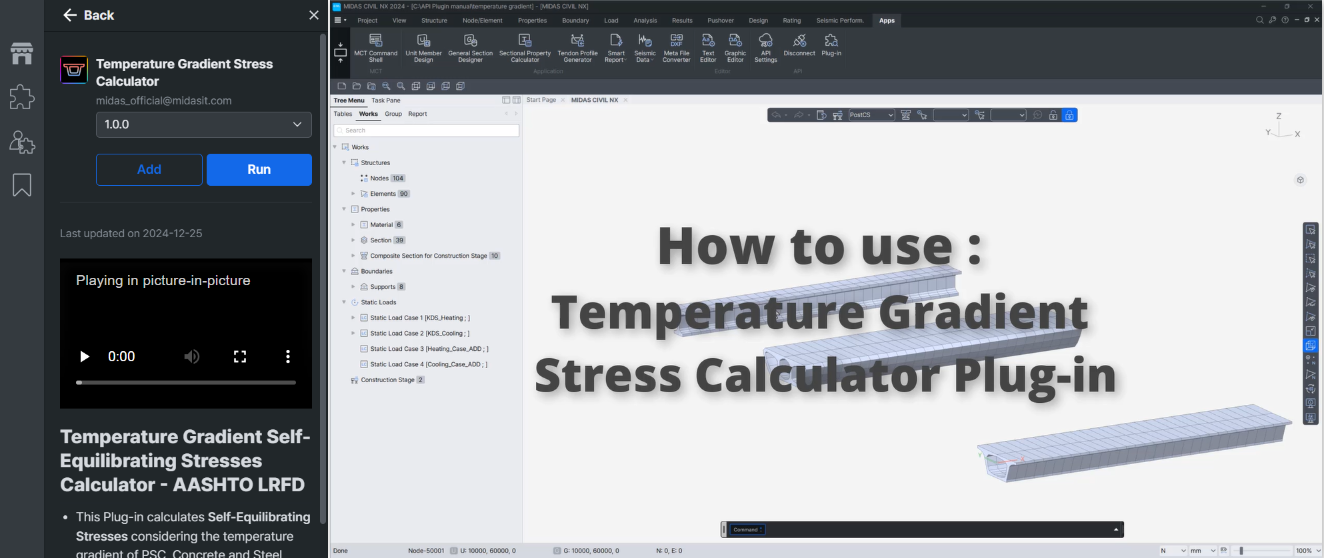
Plug-in video tutorial
Each Plug-in offers a video manual, and the users also find out why and how the Plug-in was developed by regularly uploading blogs via MIDAS BRIDGE.
MIDAS will back you until all MIDAS users can focus on the Engineering Work, not functional work.
3. Excel Add-in: MIDAS Connector
MIDAS has introduced a new tool, the MIDAS Connector, to streamline workflow processes. Traditionally, users have spent considerable time copying and pasting numerous result tables from MIDAS CIVIL into Excel for further design tasks. The introduction of the MIDAS API has marked a shift in this repetitive process, offering users a more efficient alternative. The MIDAS API team envisions a future where users can seamlessly leverage this tool for convenient, rapid, and effective post-processing. While the MIDAS Connector initially focused on retrieving result tables and graphics via dynamic reports, its future iterations will prioritize enhancing the usability of the MIDAS API. Further details on this development will be provided.
a) Installation
- MIDAS Connector is available for Excel 2021 and above versions.

MS Excel Ribbon Home menu
- Run the Excel Add-ins > Access the Add-in Store.
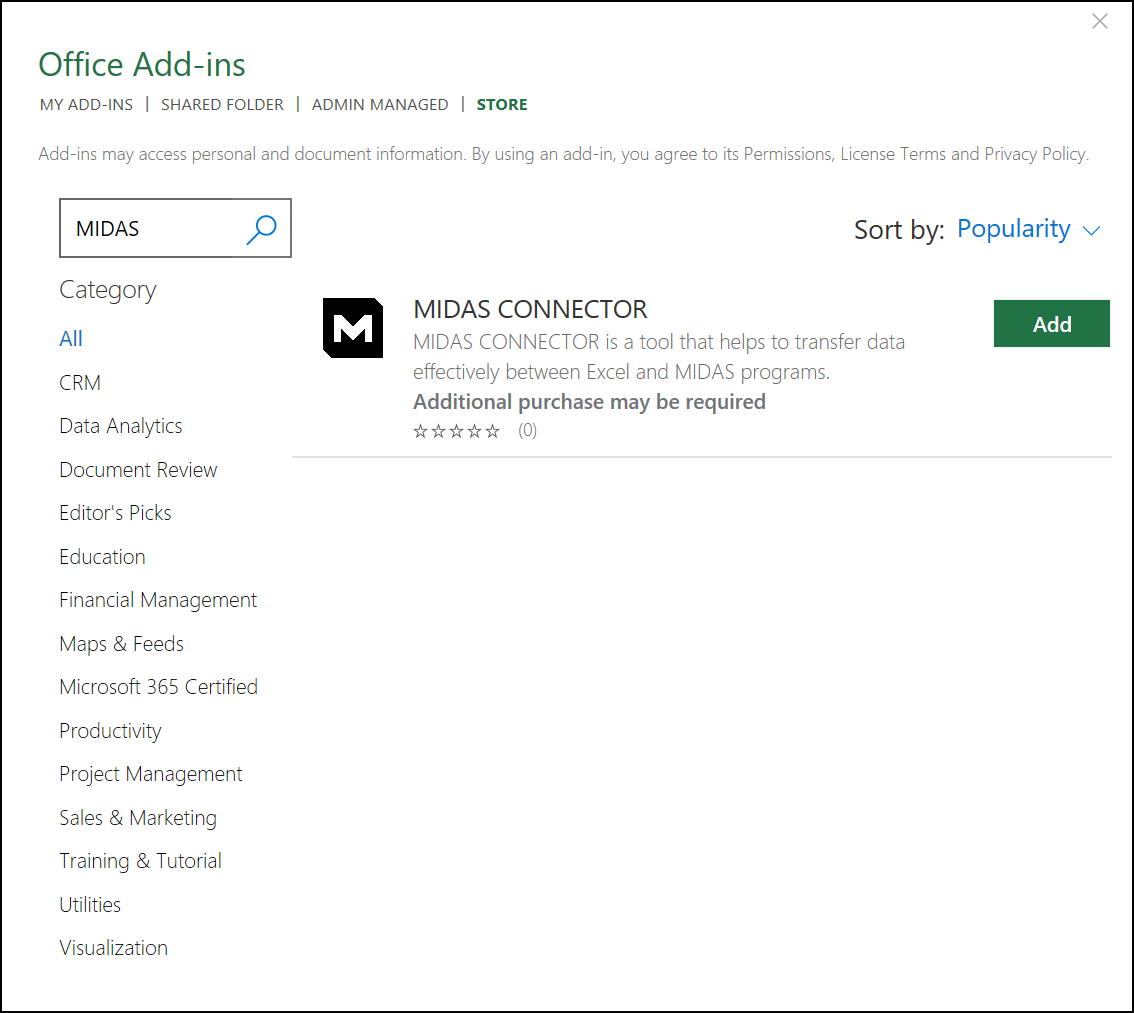
MS Add-ins Store search: MIDAS CONNECTOR
- Search “MIDAS Connector” and Add it to your add-ins.

Added MIDAS CONNECTOR
b) Connect with your CIVIL NX & Usage methods
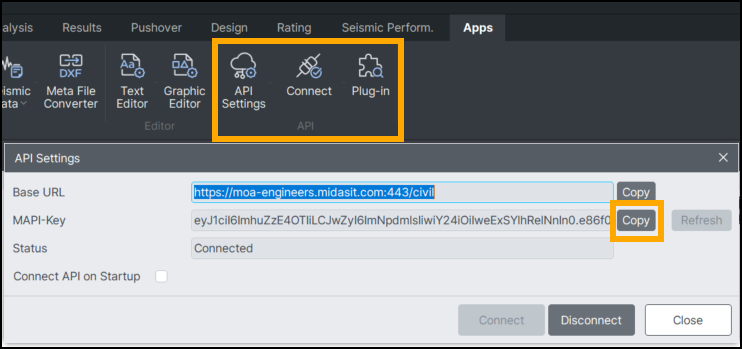
Get MAPI-Key from MIDAS CIVIL NX
- Open the MIDAS CIVIL NX and connect the API, then copy the MAPI-KEY
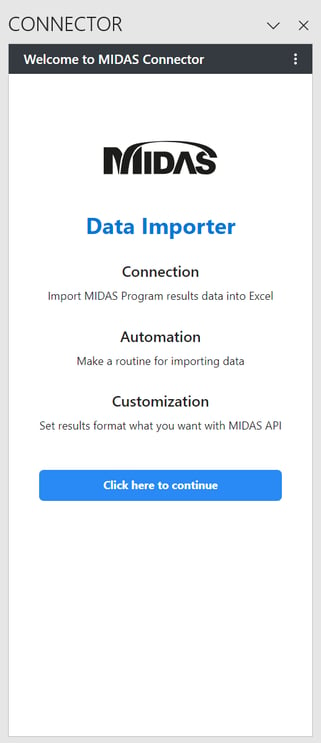
MIDAS CONNECTOR start page
- “Click here to continue” > Log in to the MIDAS MEMBERS > Agree to access Plug-in
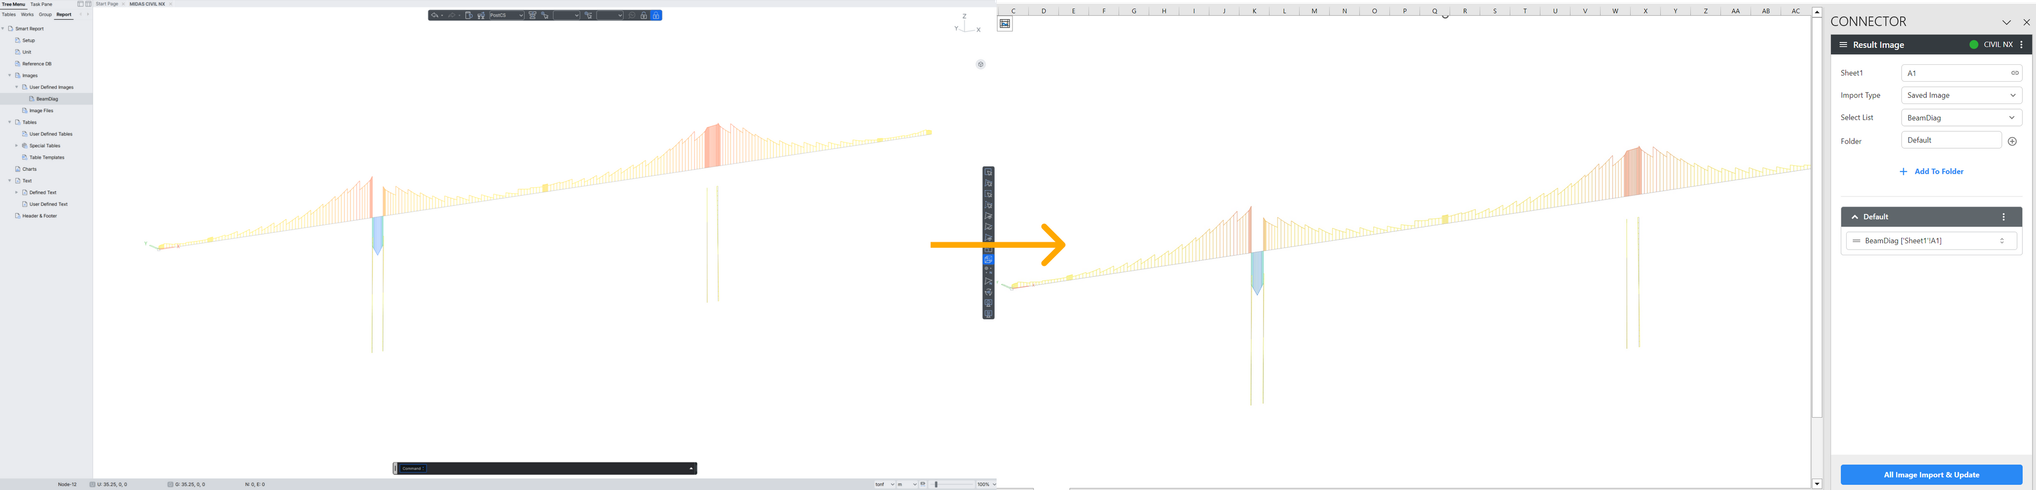
Import result graphic from MIDAS CIVIL NX using CONNECTOR
- Add the result graphics or tables on the dynamic report and import the saved list using Excel add-in.
- Once you set up your analyzed result tables and graphics on your Excel sheets, they can be updated with one button!
For additional information, visit our support website: MIDAS-Connector-Getting-Started
MIDAS will back you until all MIDAS users can focus on the Engineering Work, not functional work.